- Introduction
- Tools needed
- Opening the case
- Removing the drive belt
- Replacement belts
- First results
- Final solution
Introduction
 A Sony MDS-JE480 MiniDisc deck on top of a Sony STR-7055 stereo amplifier. A very nice combination…
Dear Readers!
It is not uncommon with home stereo devices, such as CD, Tape or even MiniDisc decks that something goes wrong mechanically speaking. In most cases when the disc tray doesn’t eject (or go in for that matter) properly, or the playback is sluggish or even stops (as with tape decks or some older turntables), the fix is relatively easy. If you’re not afraid of opening up your equipment cases and do some manual work, then the good news is, that you can probably fix it yourself. The culprit behind these anomalies is usually an aged rubber band, that isn’t tight enough anymore to provide a proper grip on the drive spools of the mechanism. And this is exactly what was happening in my Sony MDS-JE480 MiniDisc deck (picture above) a few weeks back, which is not surprising considering that it is now over 15 years old. Yes, time flies, but it is still in perfect working condition, minus the ejecting mechanism issue (which has since been fixed). Obviously nobody can expect such rubber parts to hold up for eternity, so I can’t even complain about it.
Tools needed
Considering the above written things, I’d like to share with you a method for fixing this disc ejecting issue. But before we move on, I’ll present a list of tools and parts which will be needed to start the procedure:
- A regular Philips screwdriver. For the appropriate size, just check what size you will need to remove the top cover, as the internal 4 screws that you will need to remove as well will have the same size.
- A hook-ended tool that fits in the front disc opening of your deck. If your tool doesn’t fit, don’t even consider using it, just look for something that fits nicely. You will need to fiddle with this in the inside of your disc mechanism, where space is tight and several very sensitive parts are located. Also, without this you won’t be able to remove the old drive belt, let alone install the new one. This tool is the most important actually, so make sure you have the right one.
- Replacement drive belt. This is actually a tough one, as I couldn’t find any specifications what kind of belt I need. For more specifics on the appropriate belt, head down to the appropriate part of this guide.
- A test disc. A regular minidisc that you are willing to damage if something goes wrong. Chances for damaging the disc are low, but things can happen, as they did with me.
Opening the case
So let’s open up that case, and let’s see what is inside:
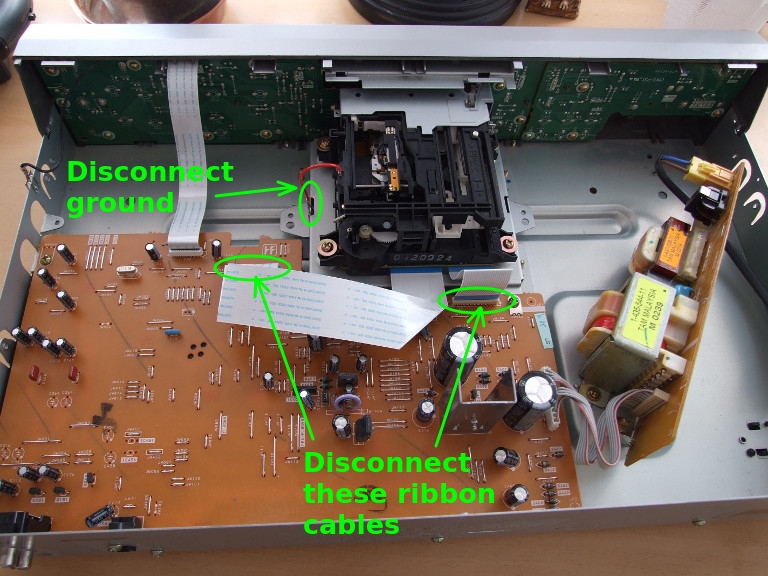 Interior of the MDS-JE480 MiniDisc deck
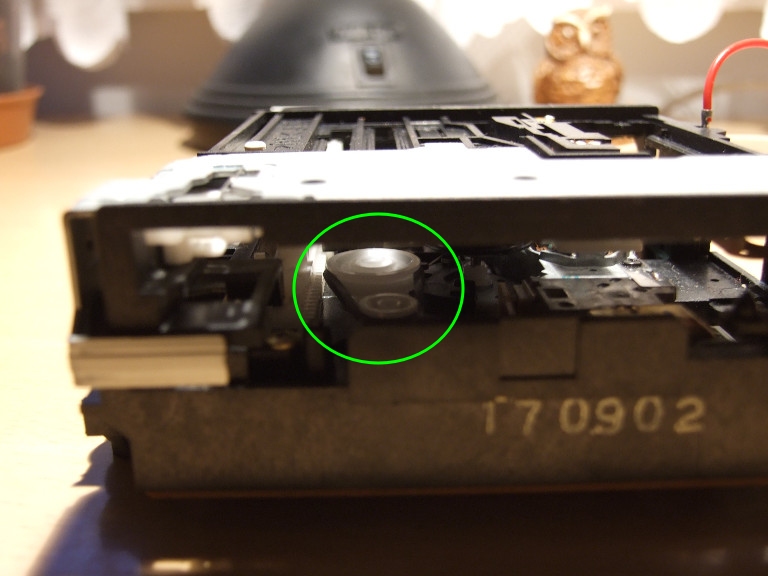
As you can see, the interior is quite roomy and relatively simply built, so fixing it won’t be a brain surgery. The only thing we need to do is to gently remove the two ribbon cables and the ground connection as marked above and depicted below.
 Disconnected these cables
Now we only need to unscrew the four Philips screws holding the mechanism in place, and then the whole thing comes out easily leaving a big empty space behind (see below).
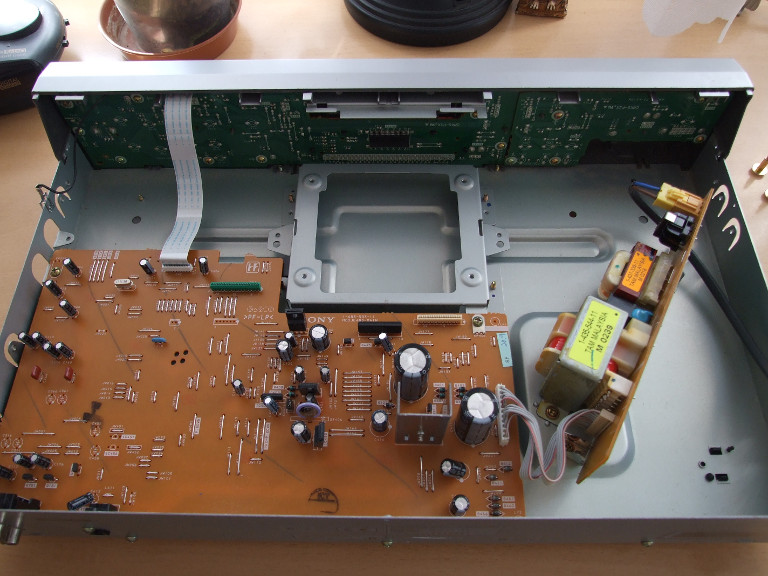 Drive mechanism removed
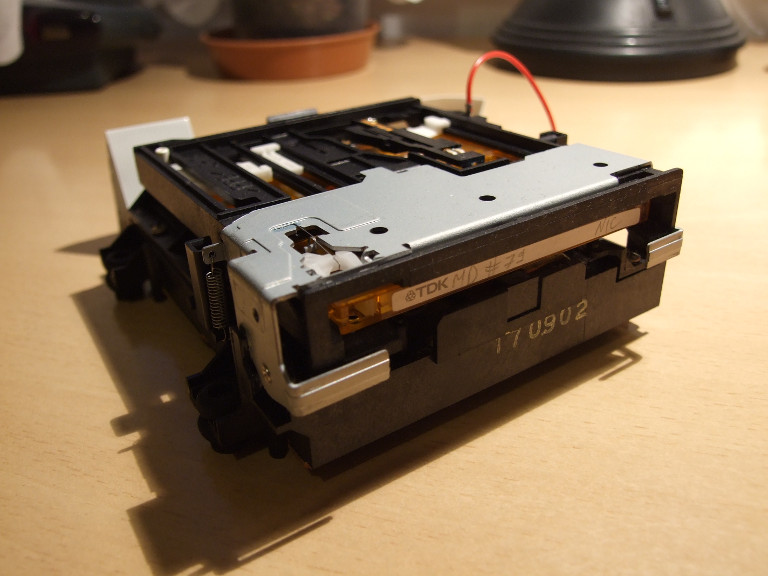
Below you can see the mechanism separately, now outside the deck casing. Please be very careful when unscrewing and removing the apparatus, never touch it anywhere but on the sides. The read and write heads are entirely exposed (especially the write one, as it is on the very top), nothing protects them. Not only screwdrivers, but also dust can be your enemy, so be sure not to damage or contaminate them in any way. Be extra careful the entire time.
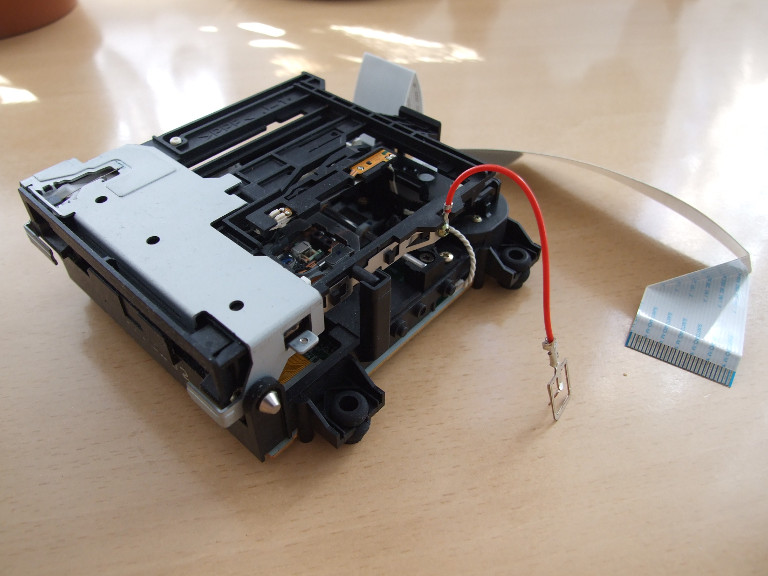 The nice and compact drive mechanism of the MDS-JE480 with the read and write heads totally exposed
Removing the drive belt
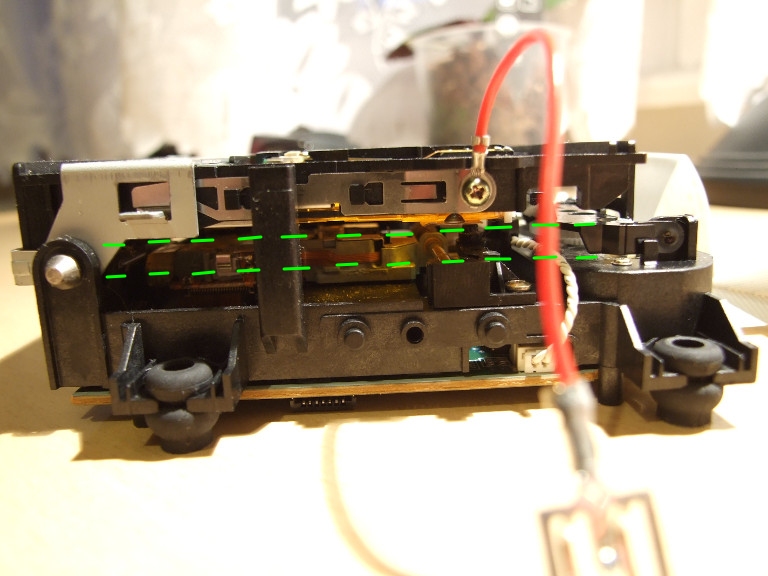
The rubber drive belt is located inside the mechanism and is only accessible from the front, where you would normally insert the disc (see below), hence the need to remove the whole unit. In order to remove the belt, you will need the aforementioned hook ended tool, so make sure again that you have a suitable one.
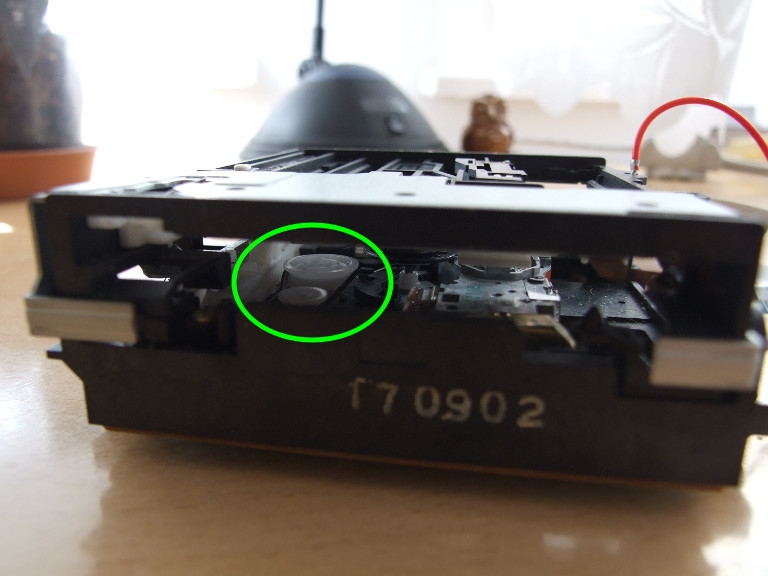 And there is the belt we need to replace
Now carefully remove the belt without touching anything else on the inside, especially the read and write heads located to the right and front of the spools. Also make sure that you are taking the belt off of the back spool first, so that if it gets loose, it won’t eject farther inside your drive mechanism.
 Be careful while removing the old belt
You can now examine your old drive belt, especially how elastic it is. Stretch it a bit and check how quickly does it regain its original shape. If it doesn’t regain its original shape immediately but there is some lag in it, then it will not provide the necessary grip on the spools, and as such it will slip when the small motor tries to drive the mechanism. The brutto effect is your disc not coming out.
Replacement belts
As a replacement belt you can probably find a lot of offers on the internet, but do not buy anything hastily. As mentioned before, I did not have the specs for the original belt, and I did not want to open up the deck unless I had something to play with, so I needed to experiment. First, I ordered a set of CD drive belts from ebay, but they all turned out to be unsuitable due to inadequate size (all of them were too big in outer diameter).
Since now I had the original belt in my hands, I could start looking for more appropriate replacements. I bought the following belt with a 1 mm square profile and 18 mm outer diameter (see below), also advertised as CD drive belt on ebay.
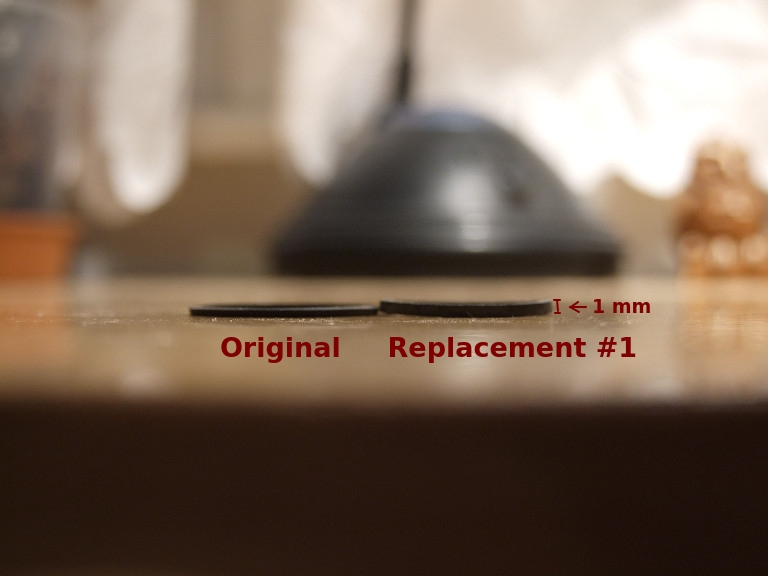 Replacement belt #1
It is clearly seen on the replacement belt that it is about twice as thick as the original, but nevertheless it fits on the spools. I also found the new belt to be quite stiff compared to the original, but since the original was worn out, it was impossible to determine how close the replacement was to a new original one. The only way to know for sure if the new belt was suitable was to try it out:
 Thick belt fits on spools, but…
First results
The result was bad. The belt was so stiff, that the little electric motor could not drive the mechanism and the disc got stuck midway:
 Disc got stuck midway
 The disc stuck midway. Note that the protective slide-shutter on the disc is already completely open
 Green dashed line shows intended final position of disc
Although the disc wouldn’t move in any direction, I was sort of lucky, because as the green dashed lines on the third image above show, the final position of the mechanism is actually below where it was stuck, so at least I could “gently force” the disc out (without damaging anything). If the disc would’ve descended to its final location, getting the disc out without dismantling the mechanism would’ve been impossible. So again, I was very lucky.
At this point I was quite disappointed by the available options for a replacement belt, so I just went to a local bearing shop and bought a couple of ordinary O-rings with the following spec: 17x1 mm. I’m not sure of the material, just ask for the most common one (or you can experiment with others as well, O-ring are really cheap). You can see a comparison of all used drive belts below:
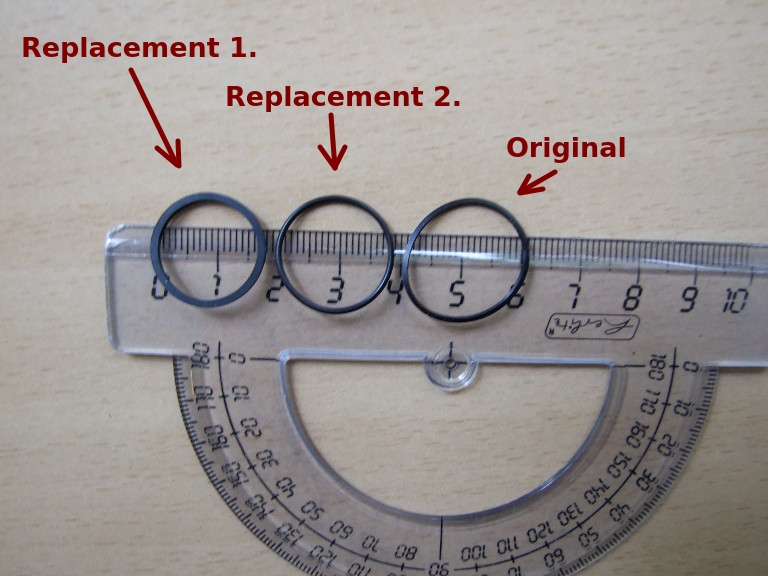 Replacement belts compared
Final solution
As you can see, the original and replacement #1 had a square cross section, while the O-ring (replacement #2) has a circular cross section, but it doesn’t matter, it still provides enough grip. Here it is installed:
 An ordinary O-ring is a good replacement
The mechanism now works as it should, problem fixed. My only concern is how long the O-ring will last, as it may be possible that the material of the O-ring might not be suitable for long term stretching. We’ll see, but even if it needs replacing, it is really cheap (~0.1 Euro/piece), unlike some of the “CD drive belts” sold on ebay. So here is a small disclaimer to end this post:
DISCLAIMER: do not use too stiff drive belts as a replacement, as your disc will get stuck midway. Check the original belt for stiffness and choose something close to that. The new belt should be able to stretch a couple of mm without excessive force.
That’s it for now, as always, thanks for reading.