Dear readers!
Just as on previous occasions, I’m sharing a small how-to for fixing a device of mine that suddenly needed some care, this time around my trusty mouse (see picture below). This is a Lenovo model MO28UOL basic optical mouse and as per Lenovo design philosophy for Thinkpads (which I really like), functionality was the main design principle used for this little device. Yes, it looks bulky and seemingly doesn’t promise any comfort, but I’ve been using it for years and my wrist or other parts of my arm never showed any sign of tire. That bulkyness has a function after all it seems, a property that for some reason is eschewed in most of contemporary mouse design, unluckily for people with larger hands.
 A model MO28UOL basic Lenovo mouse
Anyway, ranting apart, let’s examine what was the problem and how to get to a solution. Most mice are very simple devices and as such there is very little that can go wrong, but one of the things that do go kaputt, are the small switches that are responsible for detecting your clicks. One of the most common problem with these, is that they start to produce uninteded double-clicks, which can get annoying really quickly. The fix of this issue is deceptively simple and requires no special skills or tools, so let’s get through it quickly:
The first step is to remove the one and only Philips screw, an easy task to perform. After getting that out, the cover is removed by pulling it up and backwards.
 There is only one Philips screw to remove
Next, remove the wheel, which in fact isn’t held at its place very firmly. There is a single fork on the left side and a peg on the right that goes into the center of the sensor wheel. That is all.
 Remove the wheel by pulling up and left
Remove the mouse electronics, which again, isn’t held in place by anything but gravity. When assembled, the top cover has some vertical walls that prevent the PCB to move around.
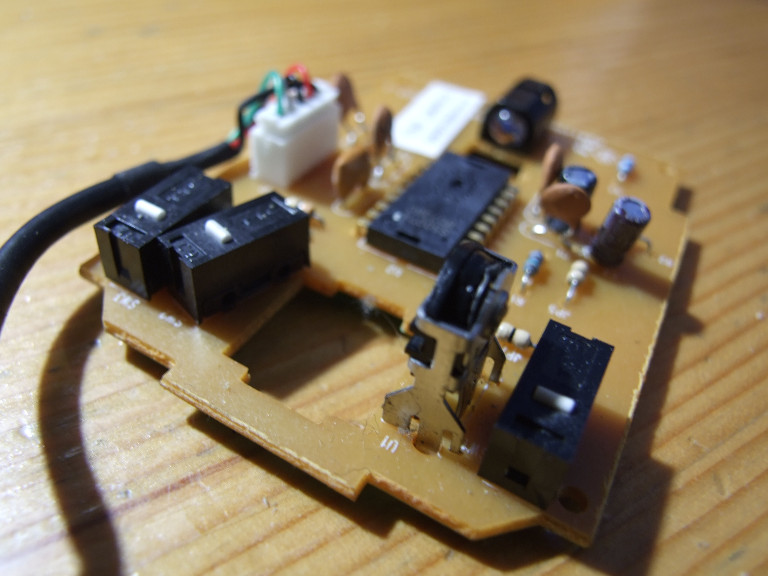 That is all the electronics a mouse needs
Pry open the misbehaving switch. It is rather small and the legs that hold the top cover of it in place are really thin and can break off really easily. Slide a thin knife or something suitable into the slit between the cover leg and the main part and then pull the cover upwards carefully. You will have to do the same procedure on the other side of the cover as well, as the small leg will not let go otherwise.
 Be careful while prying open the switch case. The cover legs can break off easily.
Use a tweezer to pull the spring contact backwards and then upwards to carefully remove it. Use the minimum force and distance possible, otherwise you risk bending the spring permanently.
 Remove the spring by pulling and then lifting it.
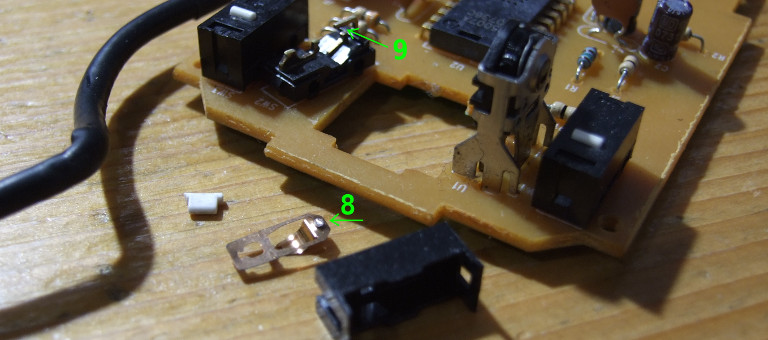
Here is the whole thing disassembled. Note the very small white plastic pusher that if lost, will render your switch and as such your mouse unusable. Don’t lose it (or any other part for that matter).
 Here is a complete disassembly
I used a P1200 sandpaper to remove the oxidation from the contact surfaces. Remeber to clean both sides of the spring and contact legs.
 Clean the contacts with fine sandpaper
Folding the sandpaper helps to clean both sides of the legs simultaneously.
 Folding the sandpaper does the trick for both sides
That is all. Now assemble the mouse in reverse order and enjoy a double-click-free experience.
As always, thanks for reading.